NiFi Kafka and Flink on Kubernetes
![]() Danger! This is a Work in Progress article, content and code is updating frequently until this notice is removed.
Danger! This is a Work in Progress article, content and code is updating frequently until this notice is removed.
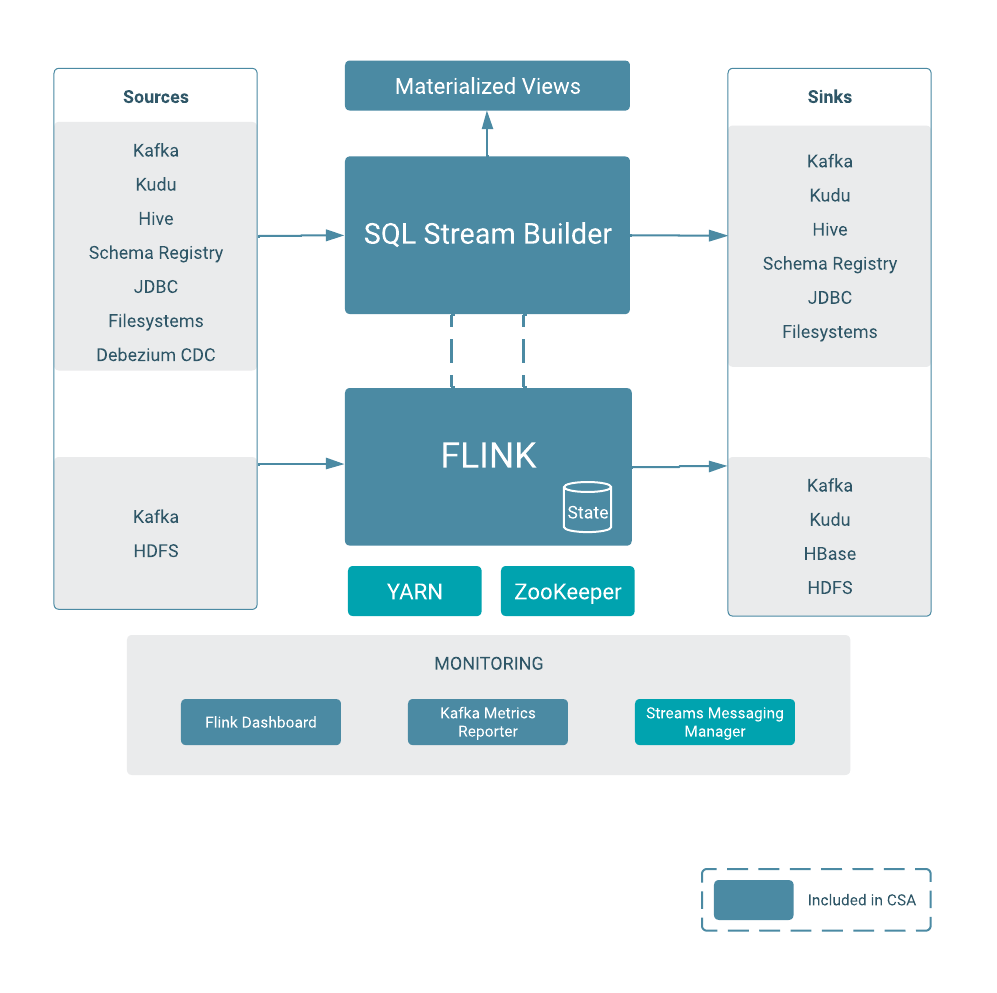
Last week I published how I installed all of the Cloudera Streaming Operators on my MacBook. This post got quite a bit of attention and I had a few friends ask if I was going to use this setup for more in-depth demos and how to do stuff with CFM, CSM, and CSA Operators. Absolutely!!
In this blog I am going to go into the next phases of working with Cloudera Streaming Operators.
Since I am so familar with the Fraud Demo I am going to use NiFi to build a simple flow to create some transactions in topic txn1, confirm the Kafka topic has data, then access SQL Stream Builder to execute a select * from txn1 query. With these simple bits, the end to end test of NiFi, Kafka, and Flink on kubernetes should be completed.
🚀 Let’s get started!
Building a Simple Flow with NiFI
Today I am working with NiFi 2.0 deployed on CFM 2.11 by the following yaml
apiVersion: cfm.cloudera.com/v1alpha1
kind: Nifi
metadata:
  name: mynifi
  namespace: cfm-streaming
spec:
  replicas: 1
  nifiVersion: "2.4.0"
  image:
    repository: container.repository.cloudera.com/cloudera/cfm-nifi-k8s
    tag: 2.11.0-b57-nifi_2.4.0.4.3.3.0-40
    pullSecret: cloudera-creds
  tiniImage:
    repository: container.repository.cloudera.com/cloudera/cfm-tini
    tag: 2.11.0-b57
    pullSecret: cloudera-creds
  hostName: mynifi.localhost
  uiConnection:
    type: Ingress
  configOverride:
    # Based on the error, we pass properties as a block or use the 2.11 'upsert' pattern
    nifiProperties:
      upsert:
        nifi.cluster.leader.election.implementation: "KubernetesLeaderElectionManager"
    authorizers: |
      <authorizers>
        <authorizer>
          <identifier>single-user-authorizer</identifier>
          <class>org.apache.nifi.authorization.single.user.SingleUserAuthorizer</class>
        </authorizer>
      </authorizers>
    loginIdentityProviders: |
      <loginIdentityProviders>
        <provider>
          <identifier>single-user-provider</identifier>
          <class>org.apache.nifi.authentication.single.user.SingleUserLoginIdentityProvider</class>
          <property name="Username">admin</property>
          <property name="Password">$2b$10$GRa8g9Z5rBENXPFNHFBosev9XmY6CSk0SdcBi5sQMRX92KD73asGG</property>
        </provider>
      </loginIdentityProviders>
  stateManagement:
    clusterProvider:
      id: kubernetes-provider
      class: org.apache.nifi.kubernetes.state.provider.KubernetesConfigMapStateProvider
To acccess the NiFi UI execute the minikube service command as follows:
minikube service mynifi-web --namespace cfm-streaming
![]() Pro Tip! Your first visit, you may need to append /nifi into your browser url.
Pro Tip! Your first visit, you may need to append /nifi into your browser url.
Next, drag out a GenerateFlowFile and PublishKafka_2_6 processor. Connect them as follows:
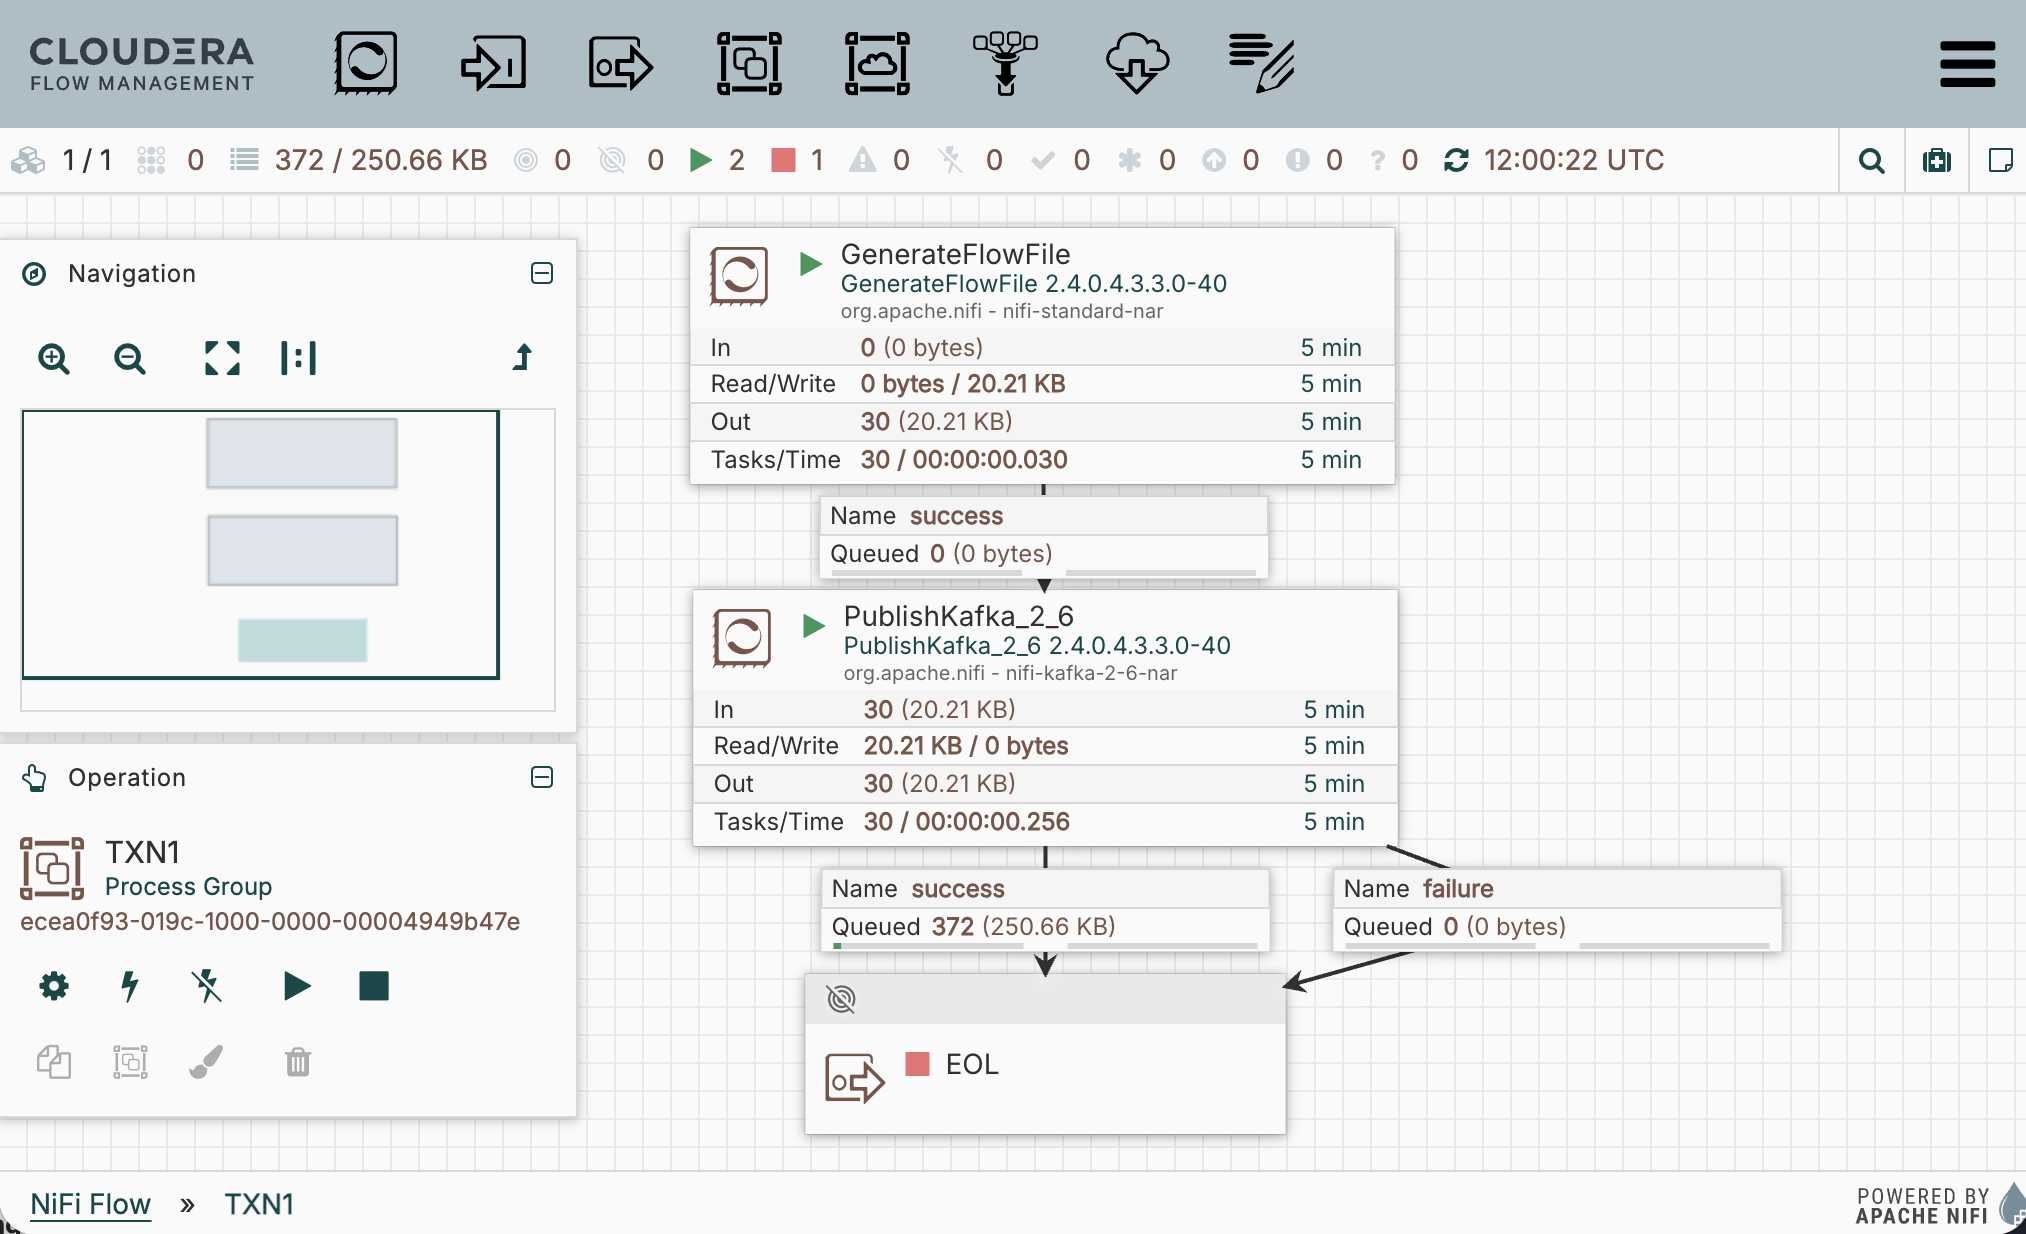
![]() Pro Tip! I always route the success and failure separately so that I can debug. Later I will use auto-termination, re-route failure back to PublishKafka, or setup retry once I confirm the processor configuration is operating as expected.
Pro Tip! I always route the success and failure separately so that I can debug. Later I will use auto-termination, re-route failure back to PublishKafka, or setup retry once I confirm the processor configuration is operating as expected.
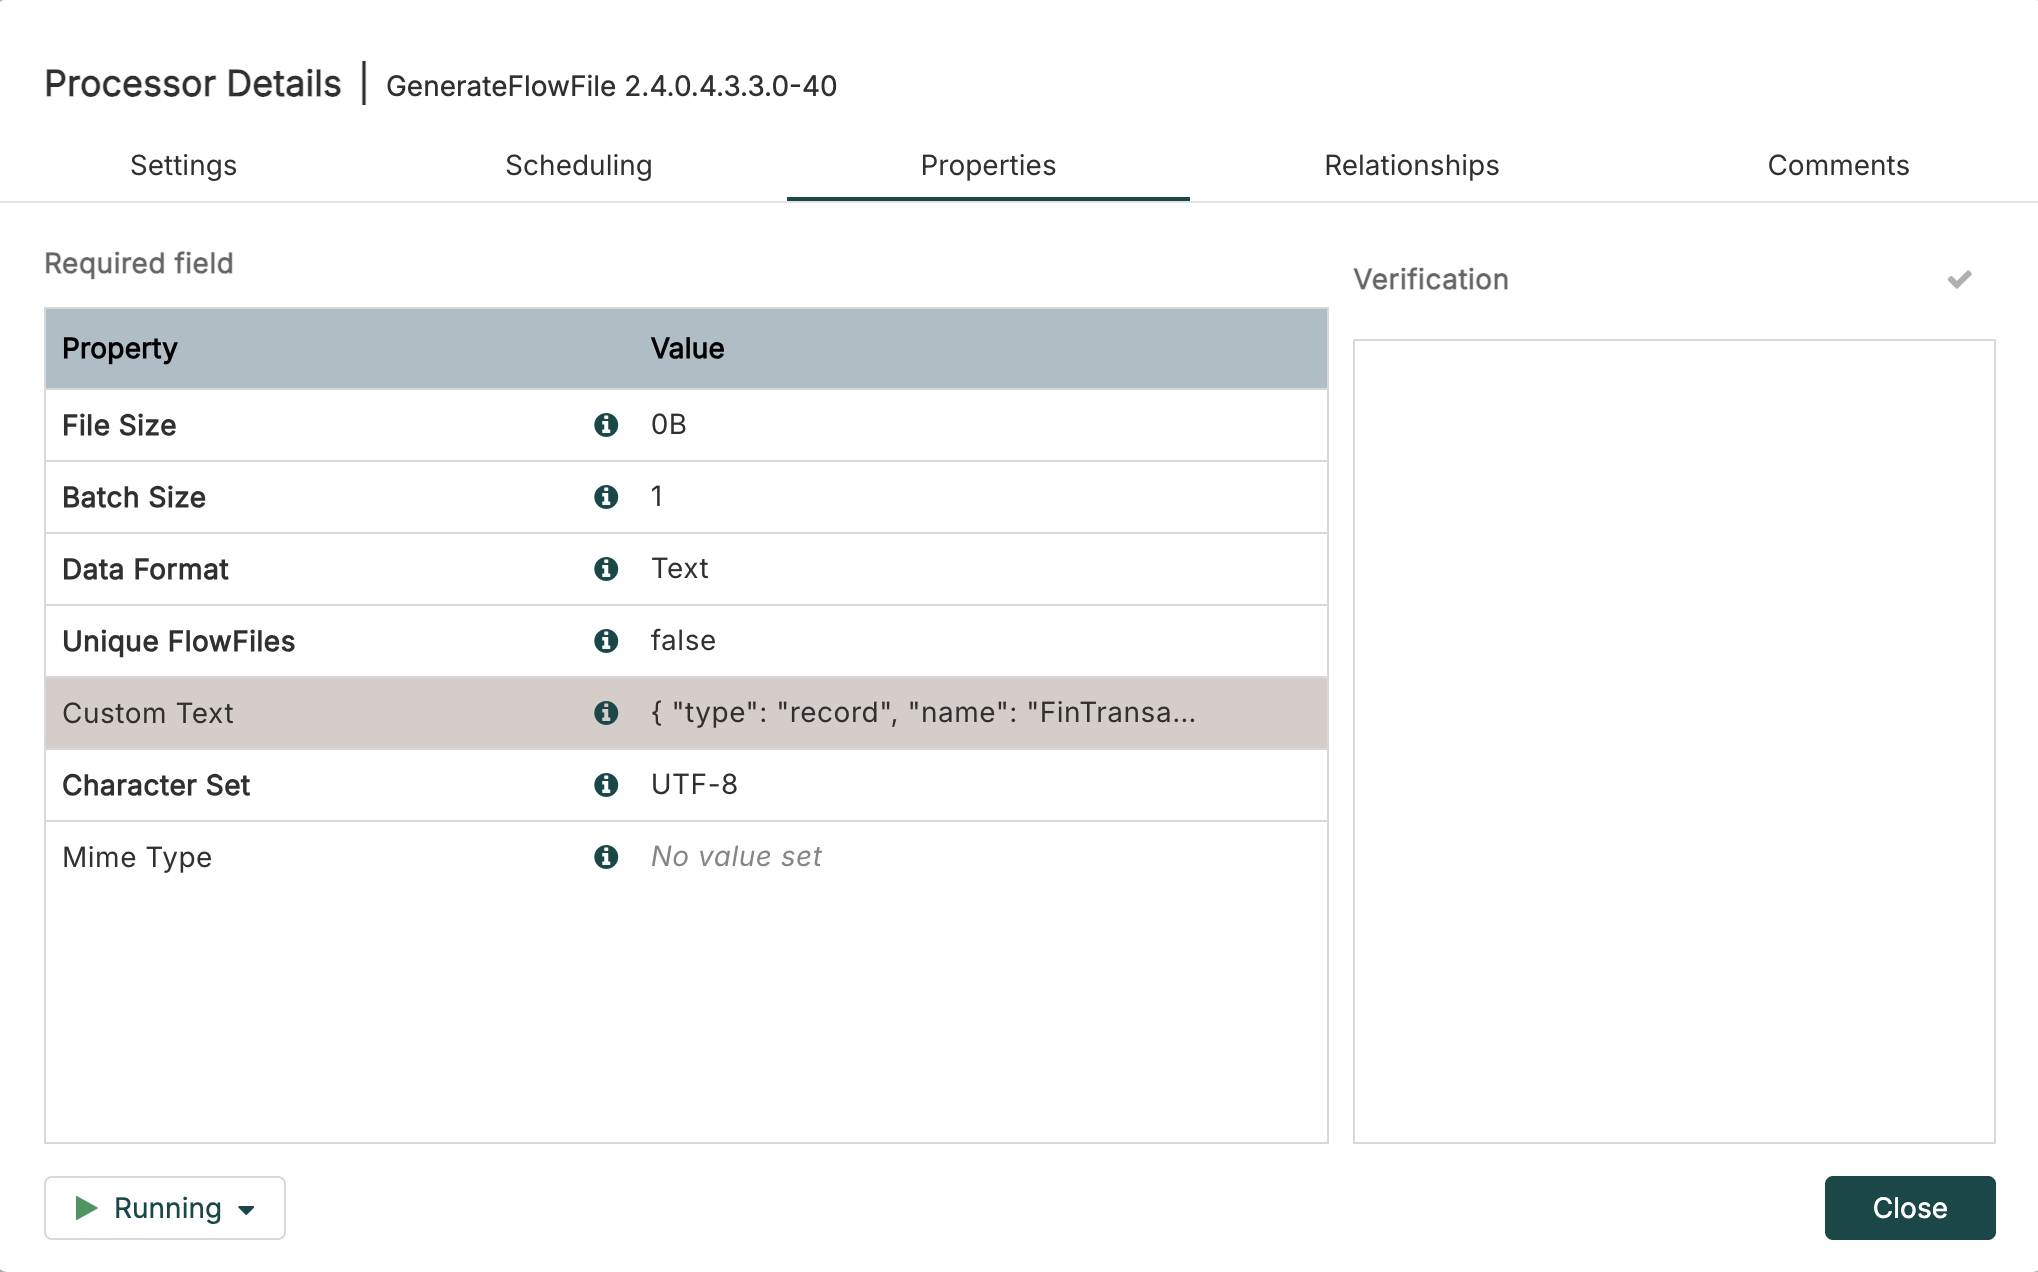
Insert this transaction json into GenerateFlowfile Custom Text:
{"transaction_id":"bc1a1d00-2134-11f1-93ac-06d0b7278335","amount":1493,"lon":4.8320114,"account_id":"486","lat":45.7578137,"ts":"2026-03-16 12:36:20"}
Next, in PublishKafka_2_6 set the Kafka Brokers and Topic Name as follows:
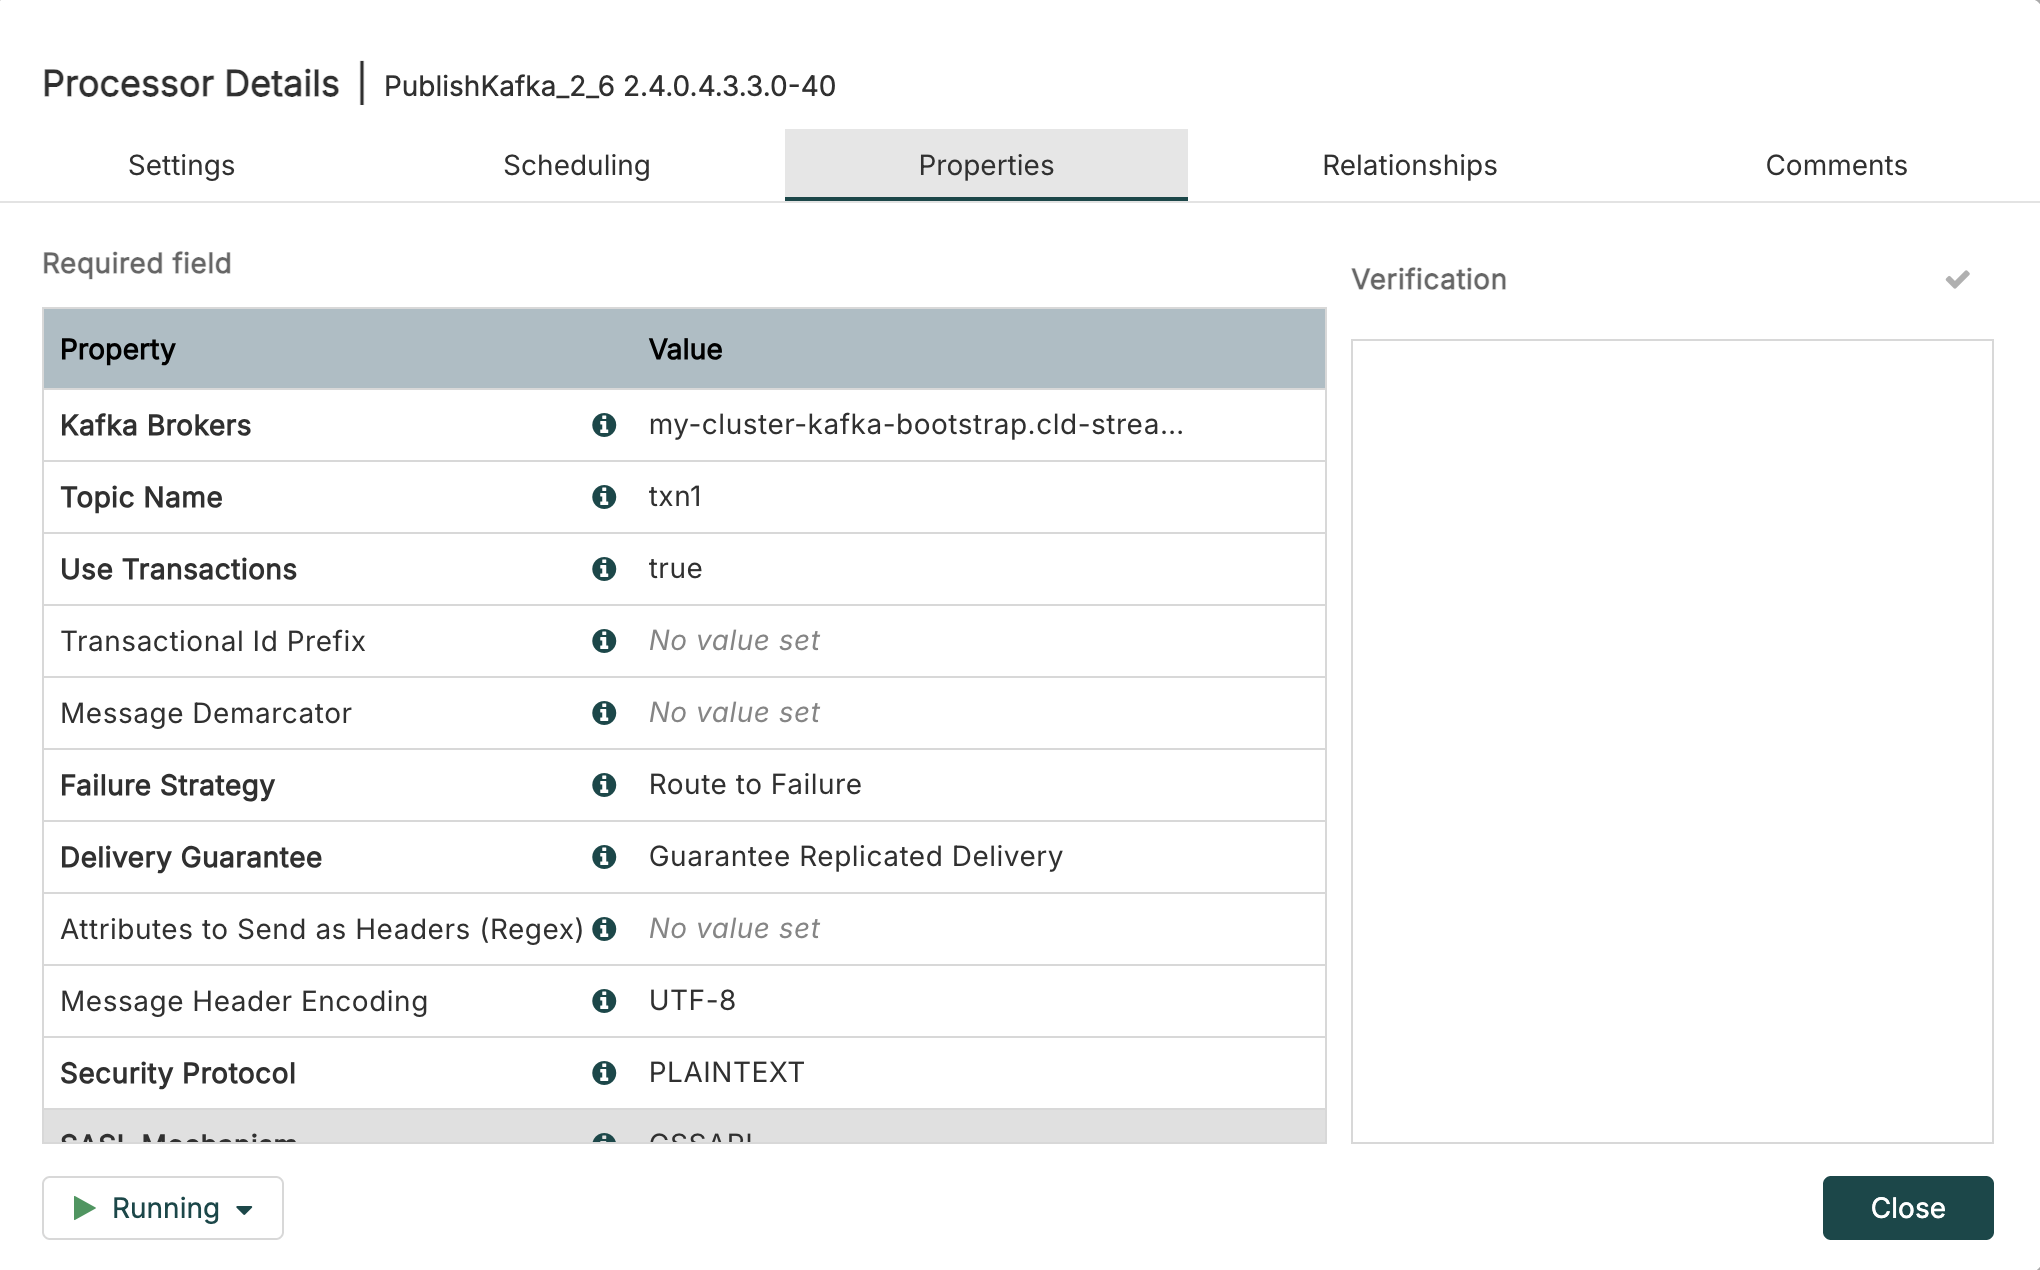
Remember we got our bootstrap servers in the previous blog: my-cluster-kafka-bootstrap.cld-streaming.svc:9092 like this:
kubectl get kafka my-cluster -n cld-streaming -o jsonpath='{.status.listeners[?(@.name=="plain")].bootstrapServers}'

my-cluster-kafka-bootstrap.cld-streaming.svc:9092
![]() Look! Take a deeper look into Kafka Brokers and bootStrapserver and notice the shape of the bootstrapServers:
Look! Take a deeper look into Kafka Brokers and bootStrapserver and notice the shape of the bootstrapServers:[clusterName]-bootstrap.[namespace].svc:9092
Start your NiFi flow and confirm PublishKafka_2_6 is sending flowfiles to success. You can now exit Nifi and close out the minikube service command. You have just successfully deployed a simple NiFi flow on kubernetes pushing transaction data to Kafka topic txn1 also on kubernetes.
![]() Pro Tip! You can find the flow definition file of the flow
Pro Tip! You can find the flow definition file of the flow TXN1.json over in my GitHub NiFi Templates.
Confirm Kafka Topic on Kubernetes
Now that we are sending data to our Kafka Topic txn1 we need to confirm that data is there. You can execute the following command to review the topic:
kubectl exec -it my-cluster-broker-only-0 -n cld-streaming -- \
  /opt/kafka/bin/kafka-console-consumer.sh \
  --bootstrap-server localhost:9092 \
  --topic txn1 \
  --from-beginning \
  --max-messages 10
Terminal output should be 10 copies of the transaction above.
{"transaction_id":"bc1a1d00-2134-11f1-93ac-06d0b7278335","amount":1493,"lon":4.8320114,"account_id":"486","lat":45.7578137,"ts":"2026-03-16 12:36:20"}
Processed a total of 10 messages
If you just want to see if the topic exists and has offsets you can run:
kubectl exec -it my-cluster-broker-only-0 -n cld-streaming -- \
  /opt/kafka/bin/kafka-topics.sh \
  --bootstrap-server localhost:9092 \
  --describe \
  --topic txn1
Notice the following output:
Topic: txn1 TopicId: ySDTMGkCTAK-EAG6DasAUg PartitionCount: 1 ReplicationFactor: 3  Configs: min.insync.replicas=2
  Topic: txn1 Partition: 0  Leader: 4 Replicas: 4,5,0 Isr: 0,5,4  Elr:  LastKnownElr:
Excellent, so now we have deployed a NiFi flow publishing transaction json to Kafka topic txn1 and we have confirmed data exists in Kafka. Now let’s move on to Sql Stream Builder.
Using Sql Stream Builder on Kubernetes
To login to SSB we will use the user admin with the password admin. Once you get logged in click into the ssb_default project and then you should have a look around. Check out the entire left menu. Open the Explorer and open all entities. Notice the different entities each have a different right navigation. As you start to use SSB you will need to be familiar with all of these.
By now we are all SQL Stream Builder pros, so I am just going to jump right into what needs to be setup to accomplish the task of select * from txn1.
First, let’s create our Kafka Data Source. Open Data Sources, in right menu for Kafka click + New Kafka Data Source. Fill the form out as follows:
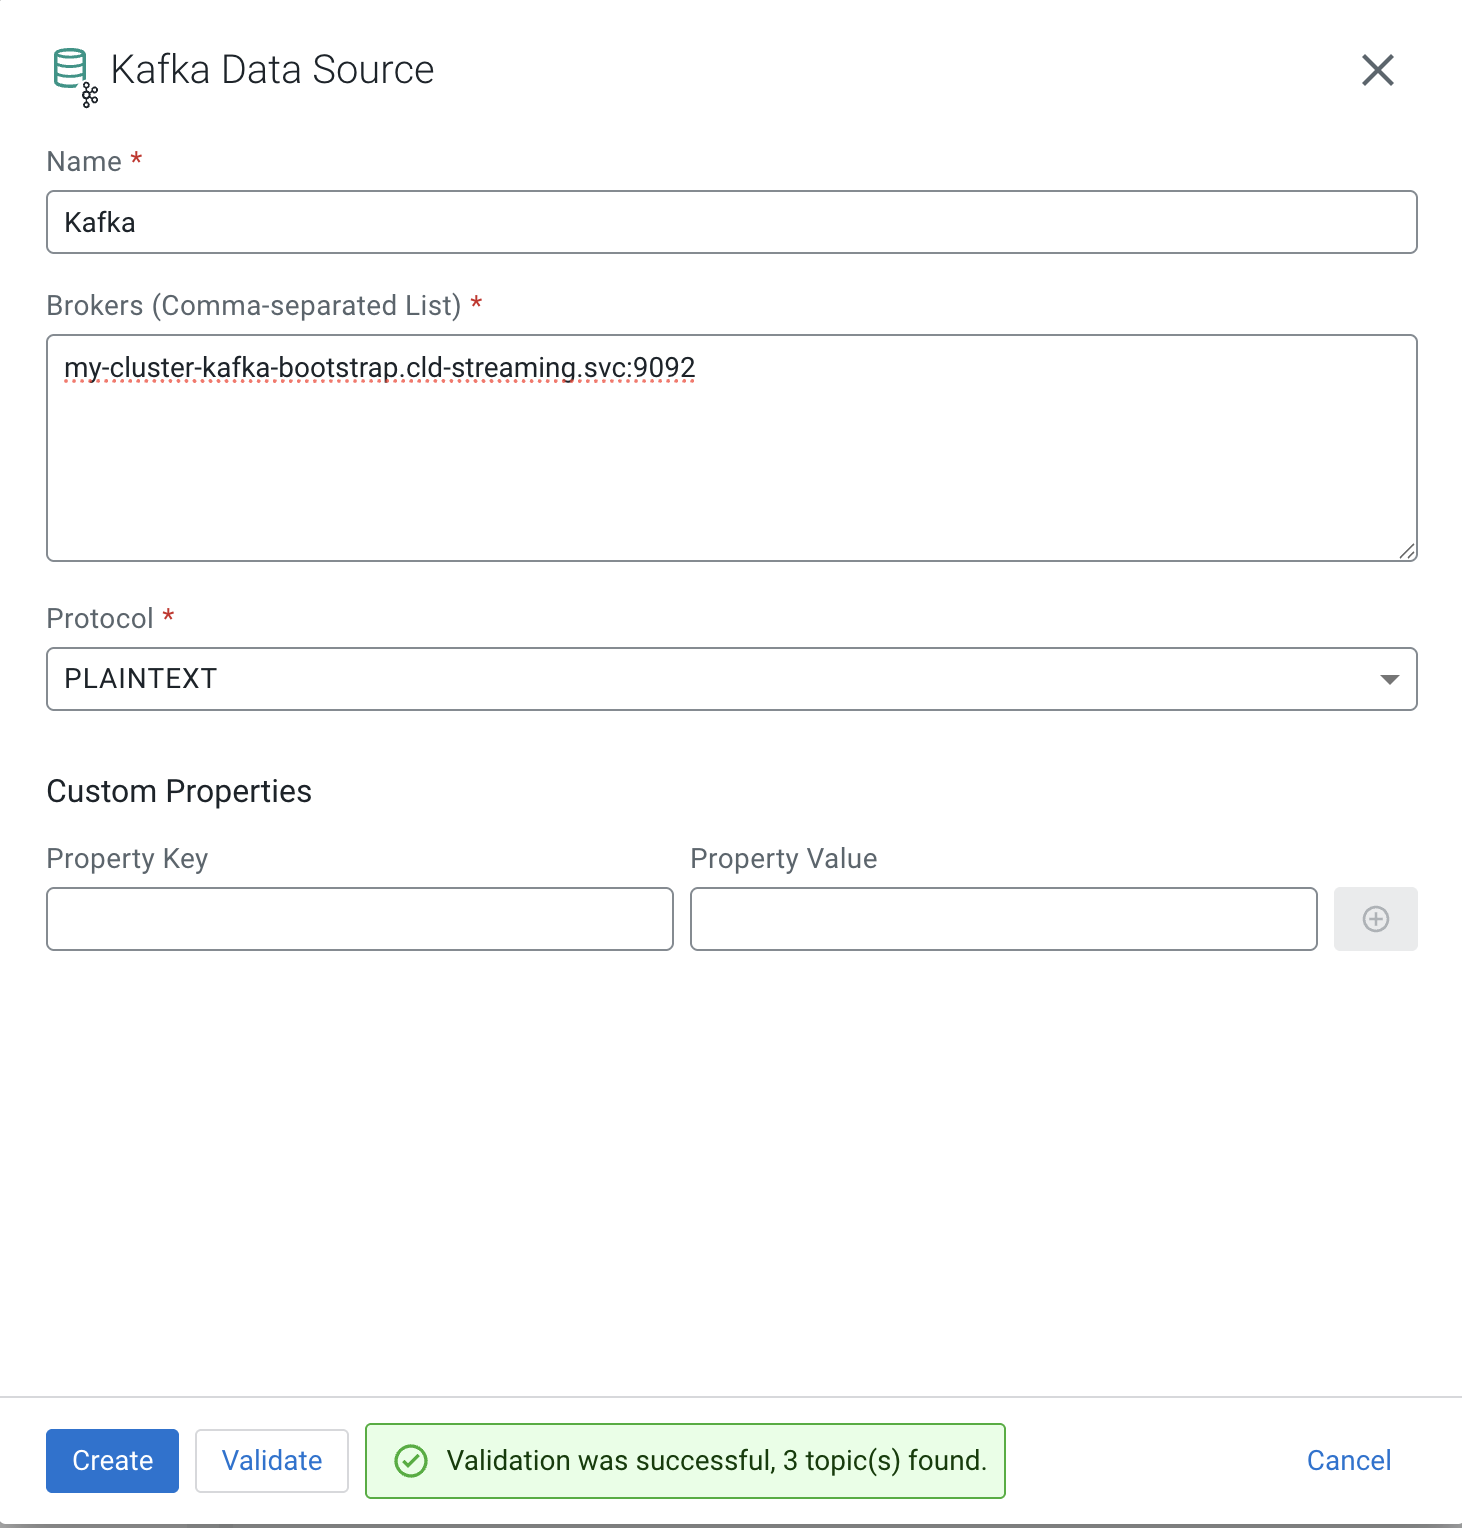
![]() Pro Tip! Notice you need to Validate before Create.
Pro Tip! Notice you need to Validate before Create.
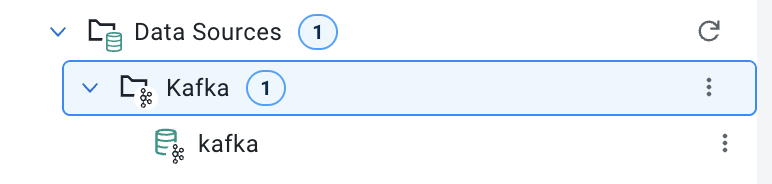
You should now see your cluster listed in Data Sources > Kafka:
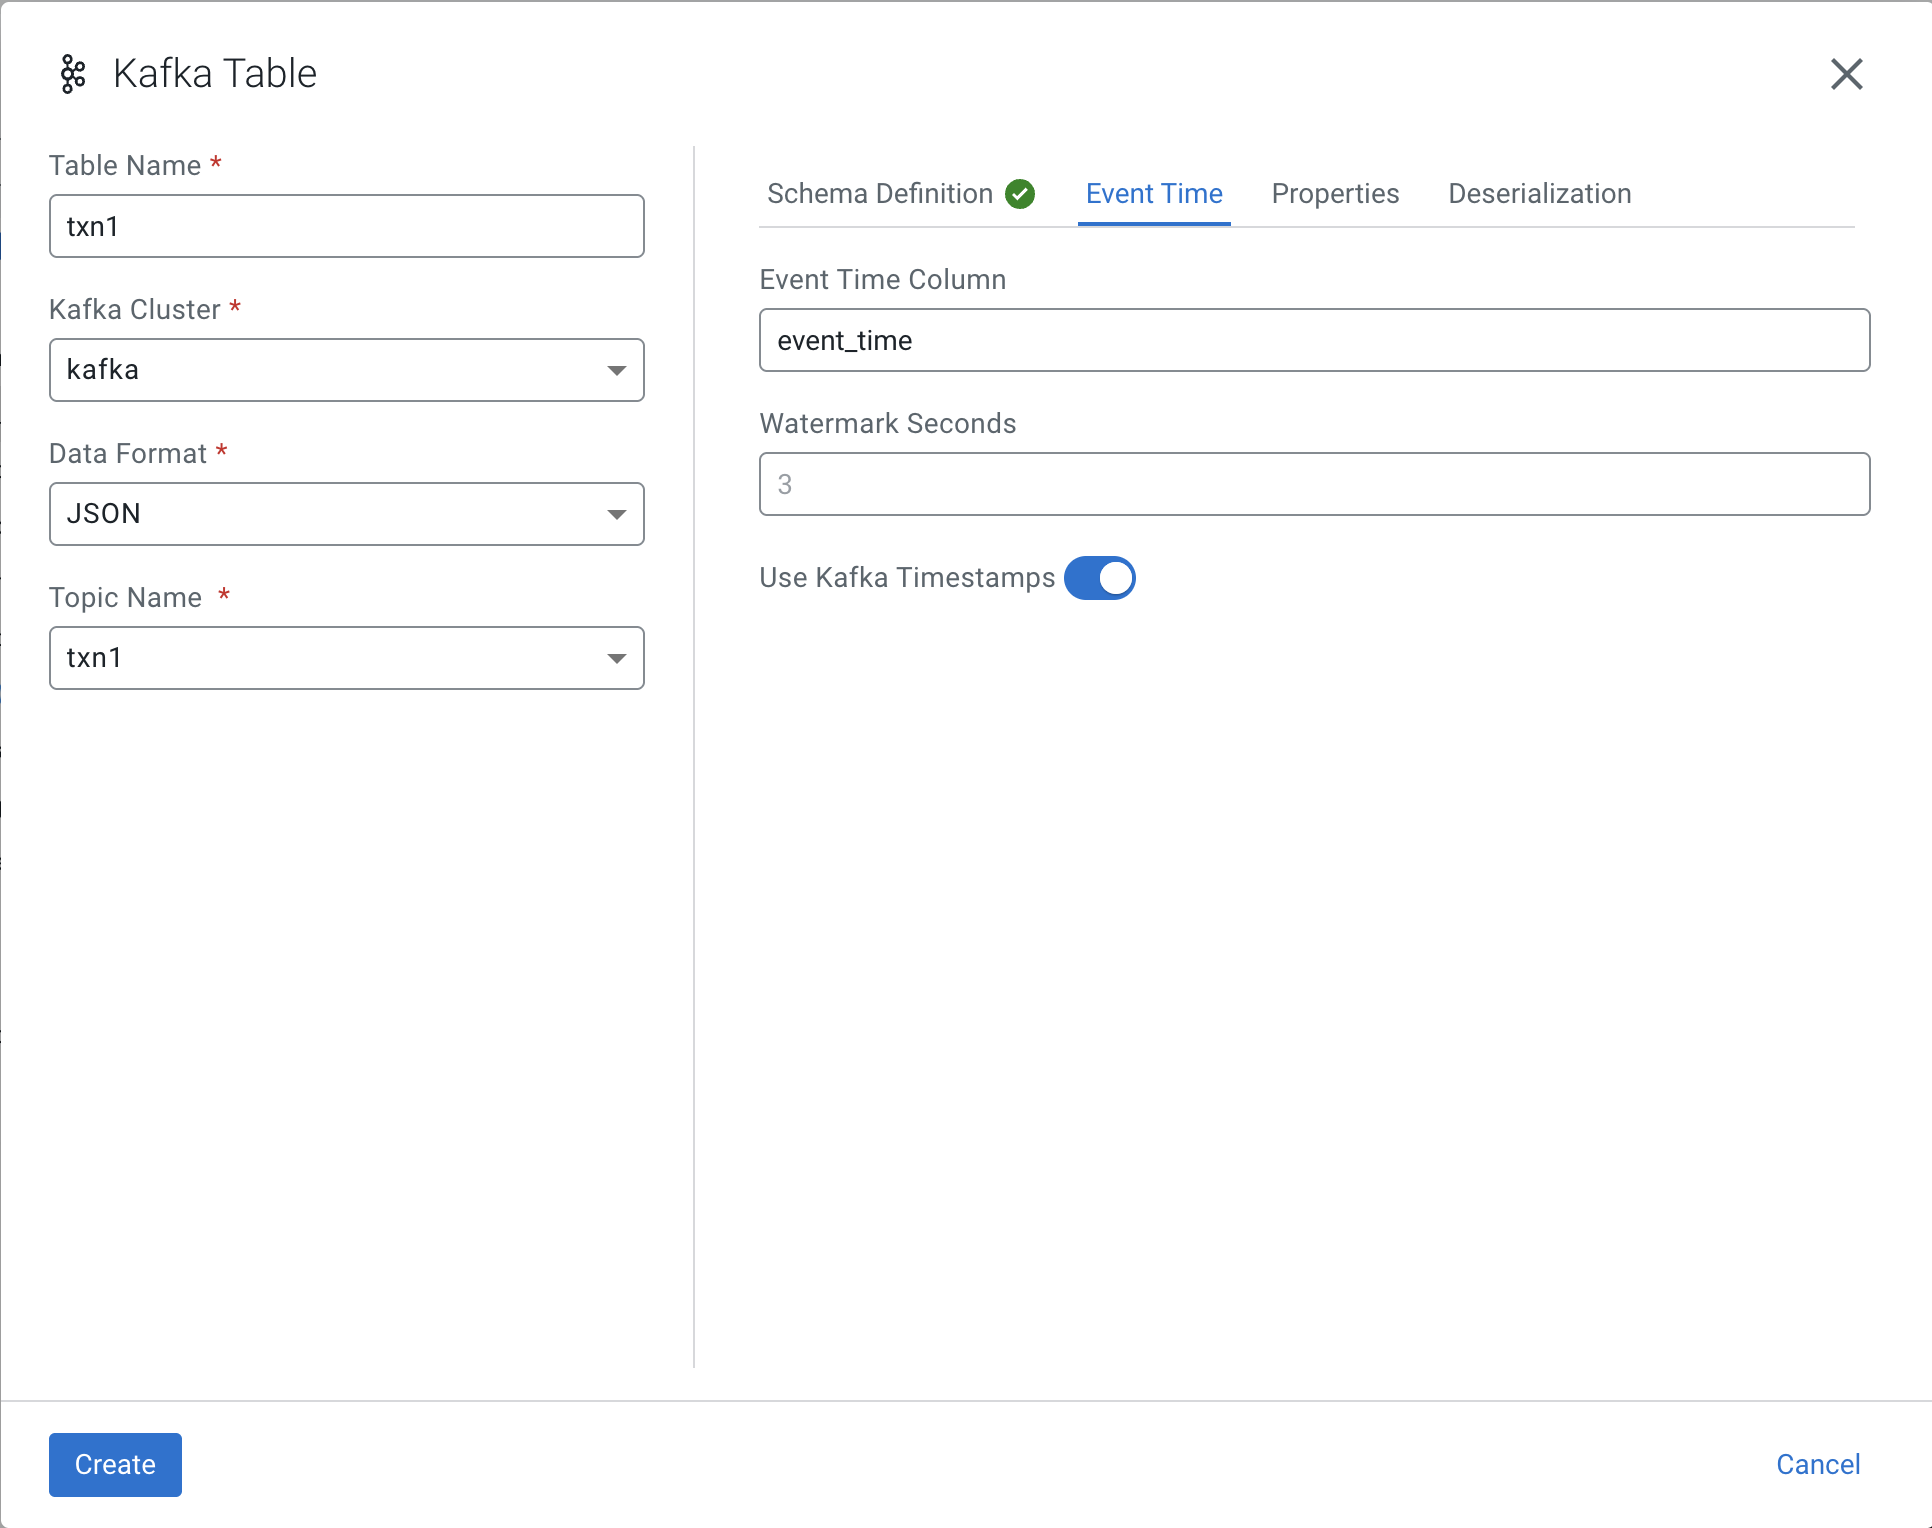
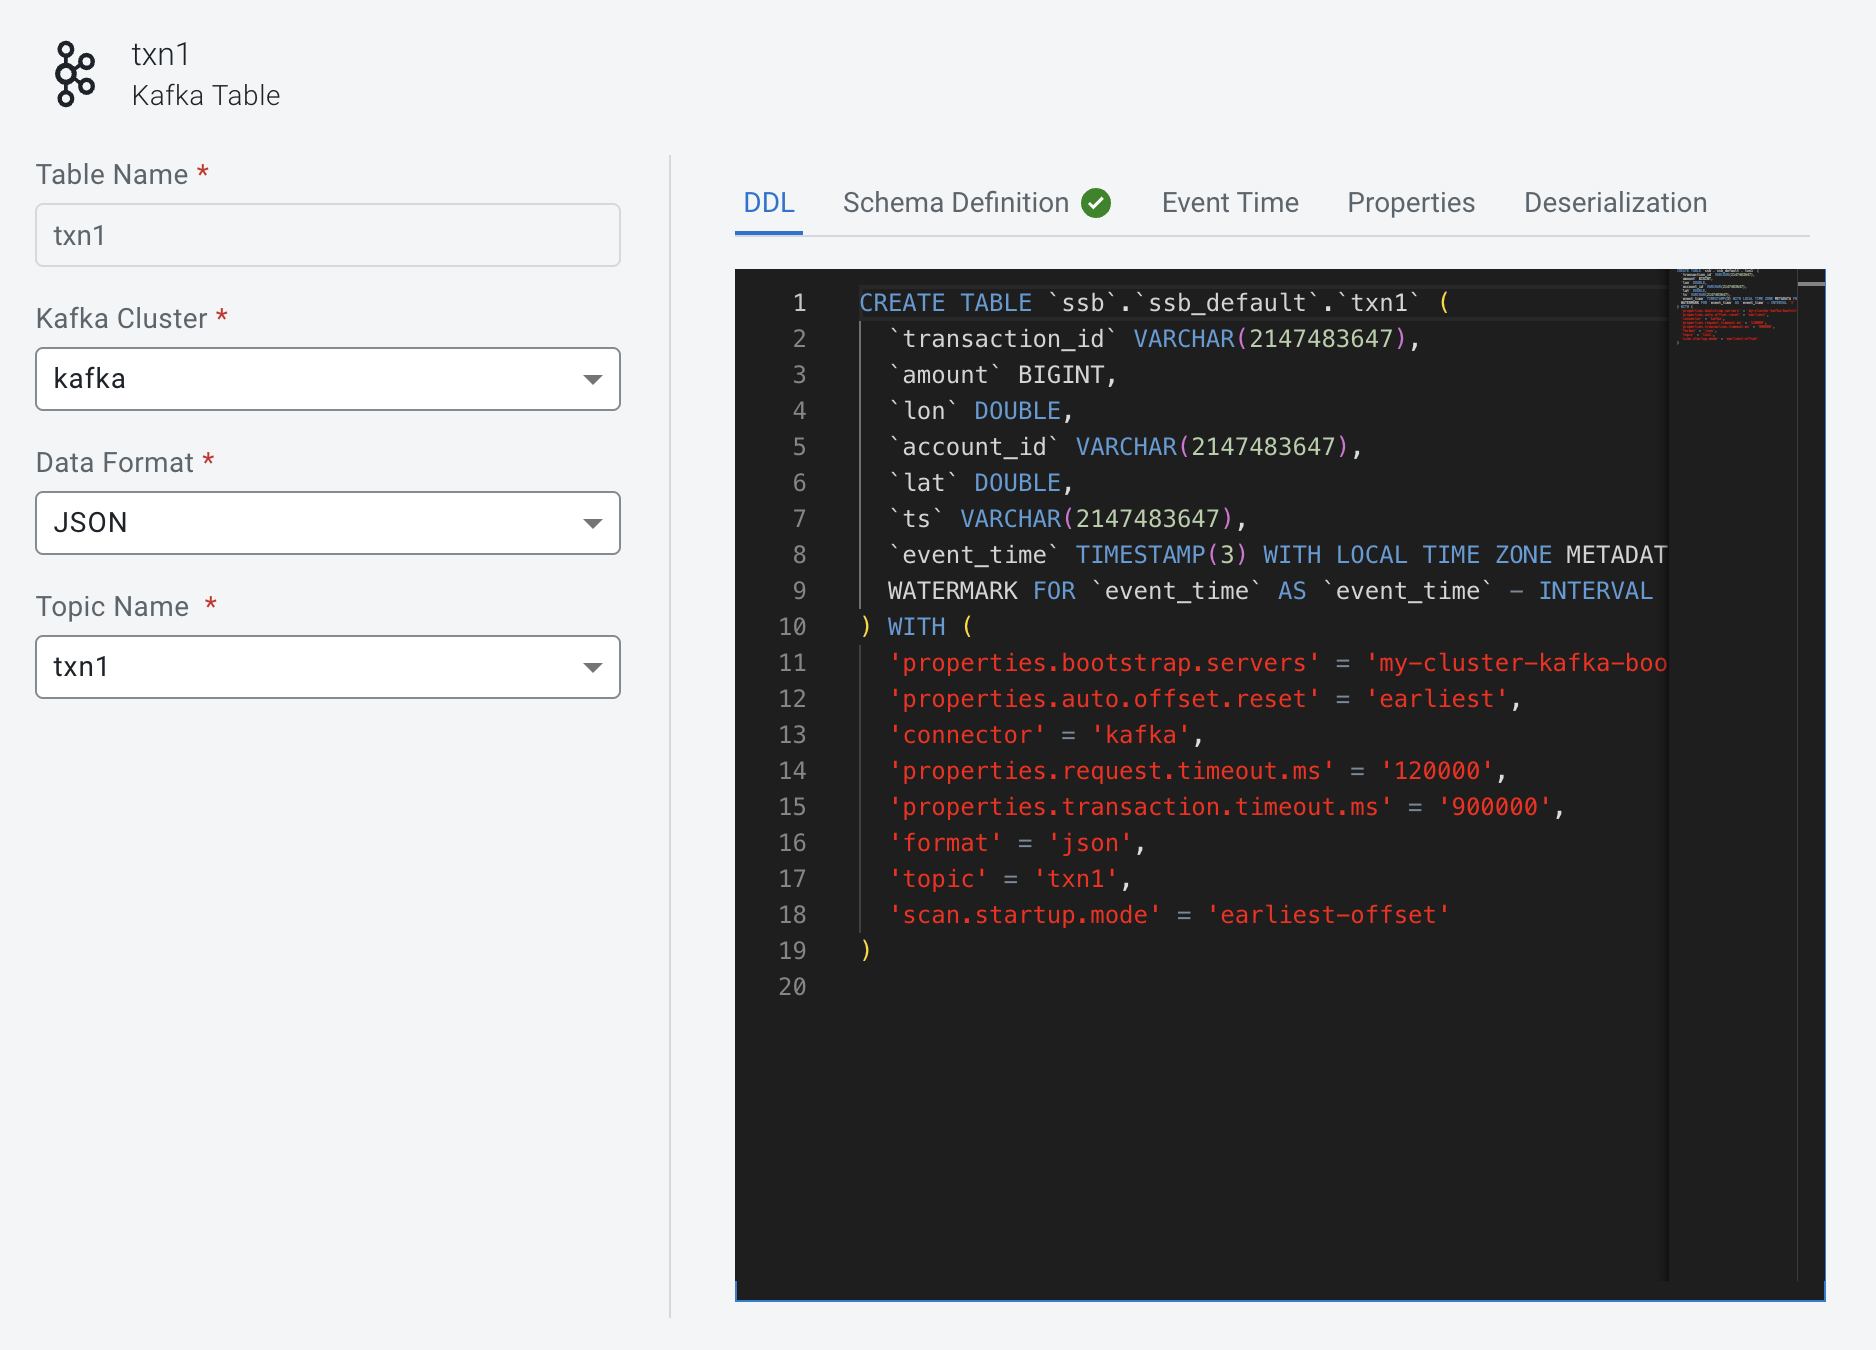
Now we can create our Virtual Table on top of our existing Kafka Topic txn1. In Virtual Tables right menu click + New Kafka Table. Fill the form out as follows:
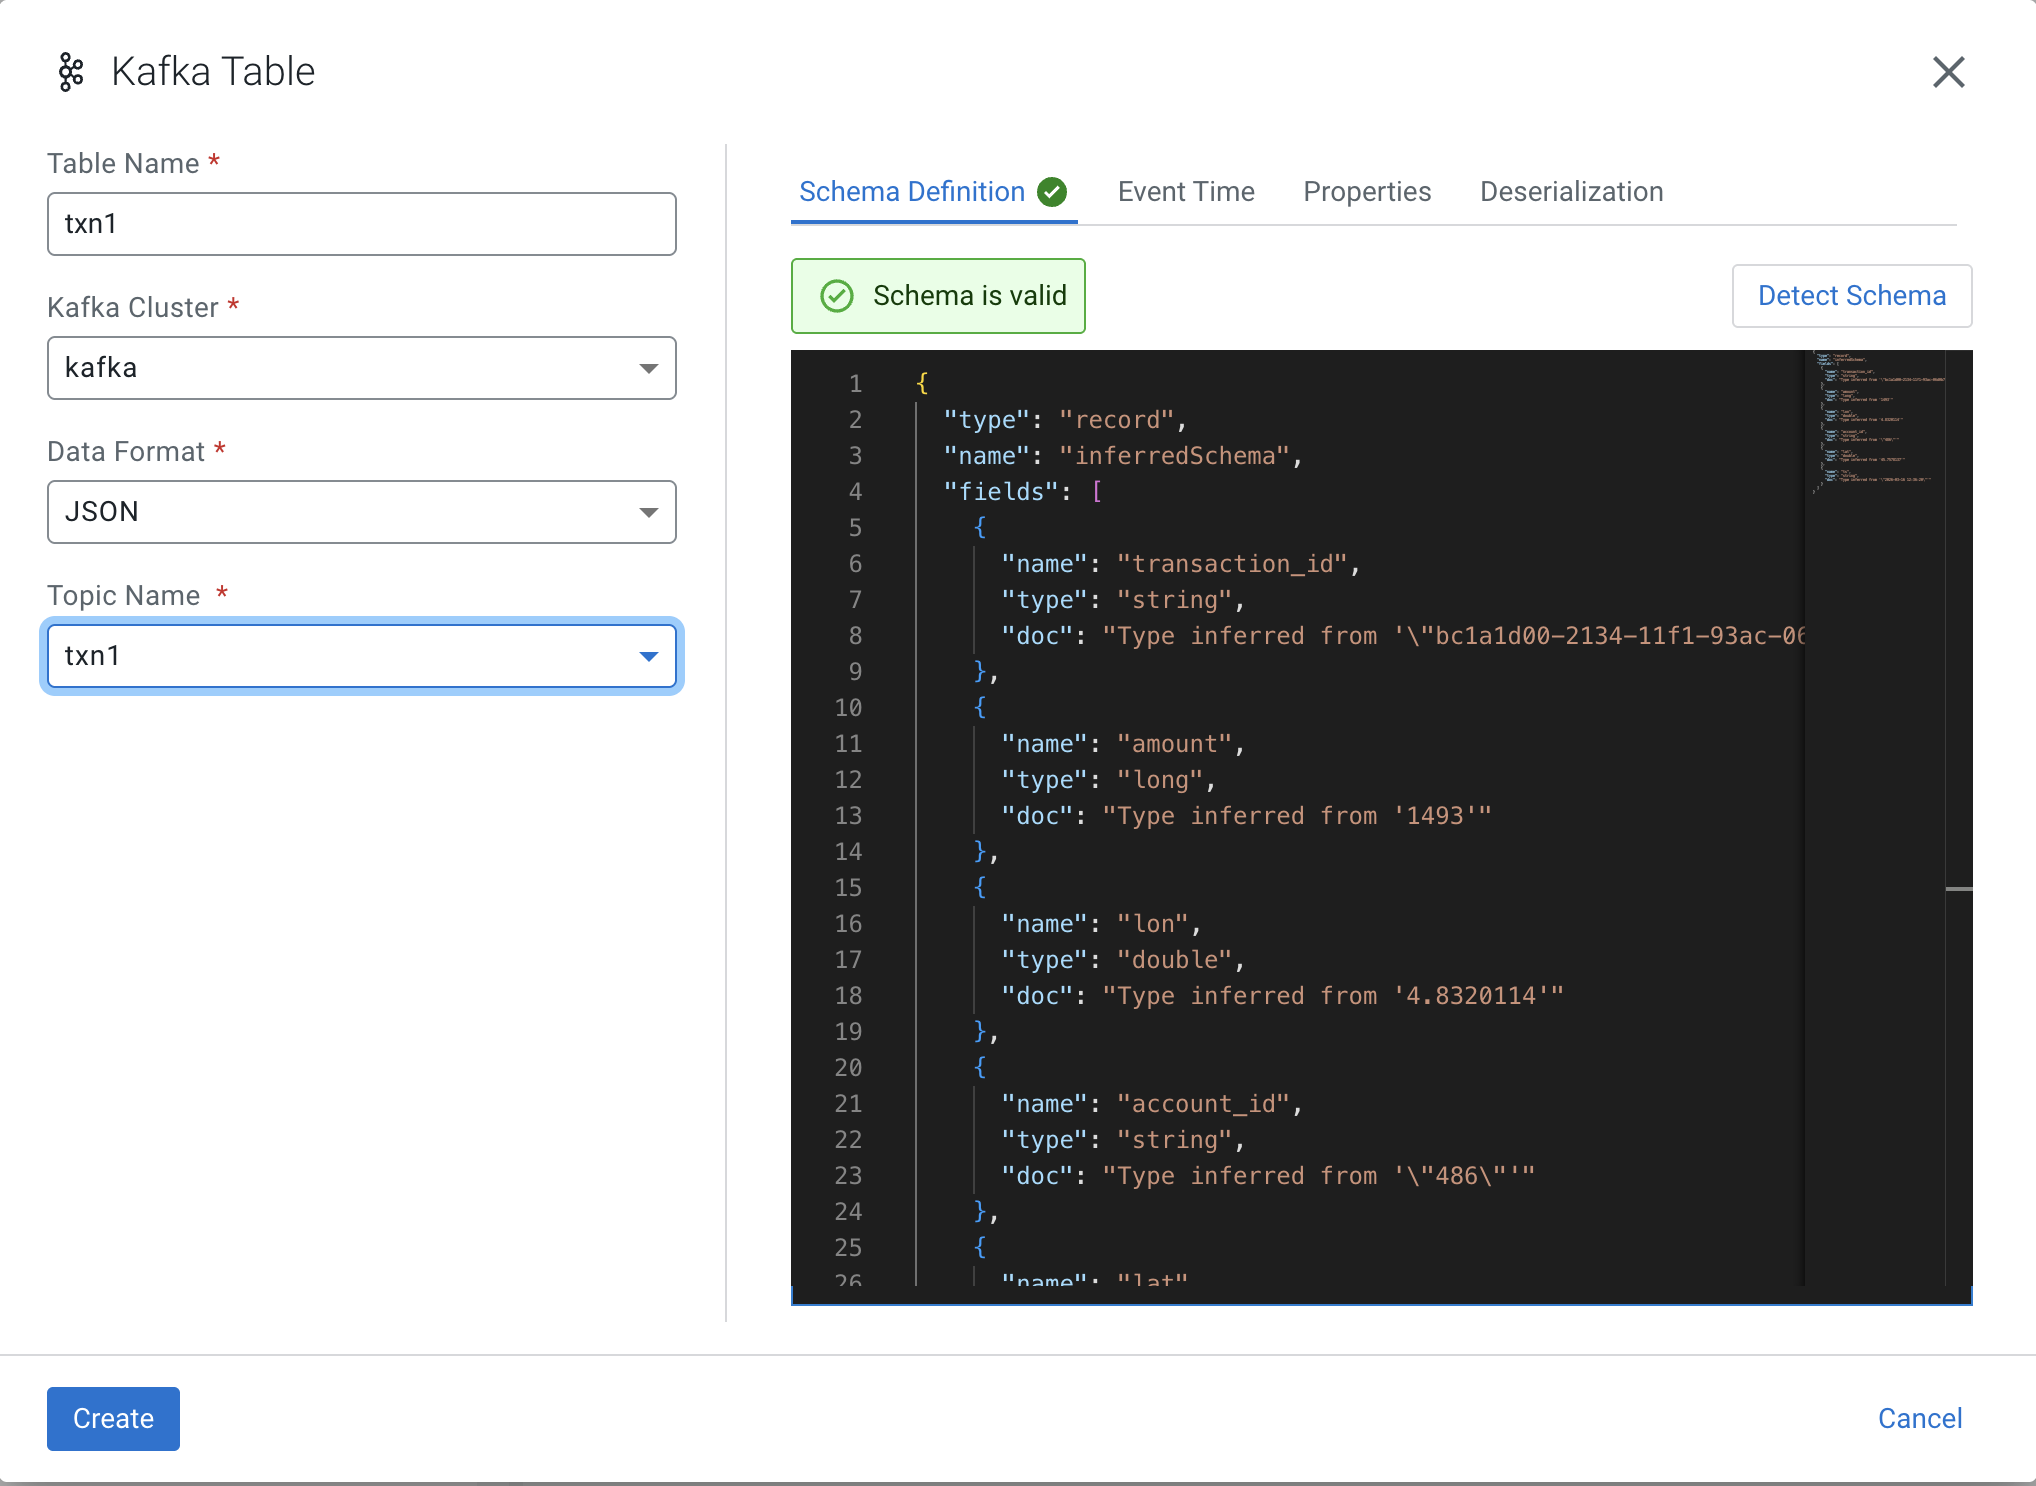
![]() WARNING! You must switch over to Event Time tab before you push Create.
WARNING! You must switch over to Event Time tab before you push Create.
Set the Event Time Column to event_time as follows then Create:
Notice the event_time column has been added to the schema:
You have reached the end of this current session. At this point I am expecting to test the select * from txn1
which I can execute without error and the job is running, but I am unable to see results. The real work behind the scene begins. I know I still need to add the Schema Registry Catalog. I also needed to learn how to get into some of the logs to begin to see what was going on. Those commands will be shared in the final section below.
![]() Danger! This is a Work in Progress article, content and code is updating frequently until this notice is removed.
Danger! This is a Work in Progress article, content and code is updating frequently until this notice is removed.
💻 Terminal Commands for this Session
minikube start --memory 16384 --cpus 6
minikube service mynifi-web --namespace cfm-streaming

# commands while working with CSM
kubectl exec -it my-cluster-broker-only-0 -n cld-streaming -- \
  /opt/kafka/bin/kafka-console-consumer.sh \
  --bootstrap-server localhost:9092 \
  --topic txn1 \
  --from-beginning \
  --max-messages 10

kubectl exec -it my-cluster-broker-only-0 -n cld-streaming -- \
  /opt/kafka/bin/kafka-topics.sh \
  --bootstrap-server localhost:9092 \
  --describe \
  --topic txn1

kubectl exec -it my-cluster-broker-only-0 -n cld-streaming -- \
  /opt/kafka/bin/kafka-topics.sh \
  --bootstrap-server localhost:9092 \
  --delete \
  --topic txn1

minikube service ssb-sse --namespace cld-streaming


# commands while working with CSA
kubectl logs ssb-session-admin-6ccdc69dc6-h28qk -n cld-streaming
kubectl logs ssb-sse-5d4474c569-n4qdd -n cld-streaming
kubectl get flinkdeployments -n cld-streaming
kubectl logs ssb-sse-5d4474c569-n4qdd -n cld-streaming | grep -i "kafka"
kubectl logs -l app=flink -c ssb-session-admin-taskmanager-1-3 -n cld-streaming -f | grep "txn_test_out"
kubectl get pods -n cld-streaming | grep -E "taskmanager|jobmanager"
kubectl logs ssb-session-admin-taskmanager-1-3 -n cld-streaming -c flink-main-container -f | grep "txn_test_out"
kubectl get svc -n cld-streaming | grep ssb
kubectl port-forward svc/ssb-session-admin-rest -n cld-streaming 8081:8081
📚 Resources
- Cloudera Streams Messaging (CSM) 1.6 Docs
- Cloudera Streaming Analytics (CSA) 1.5 Docs
- Cloudera Flow Management (CFM) 3.0 Docs
NiFi Kafka and Flink on Kubernetes
If you have any questions about the integration between these components or you would like a deeper dive, hands on experience, demos, or are interested in speaking with me further about NiFi Kafka and Flink on Kubernetes, please reach out to schedule a discussion.